
Hey There!
Here's my tutorial on how to scratch build a "Realm of Battle" ala Games Workshop
If you don't feel like reading a whole lot, just scroll through the pictures - they should give you a good idea of how to build the board. But i included some written tips as well for those who like attention to detail
Assuming you have absolutely NO hobby materials to work with, the total cost is about 105$.
Here we go. Enjoy!
The Tutorial
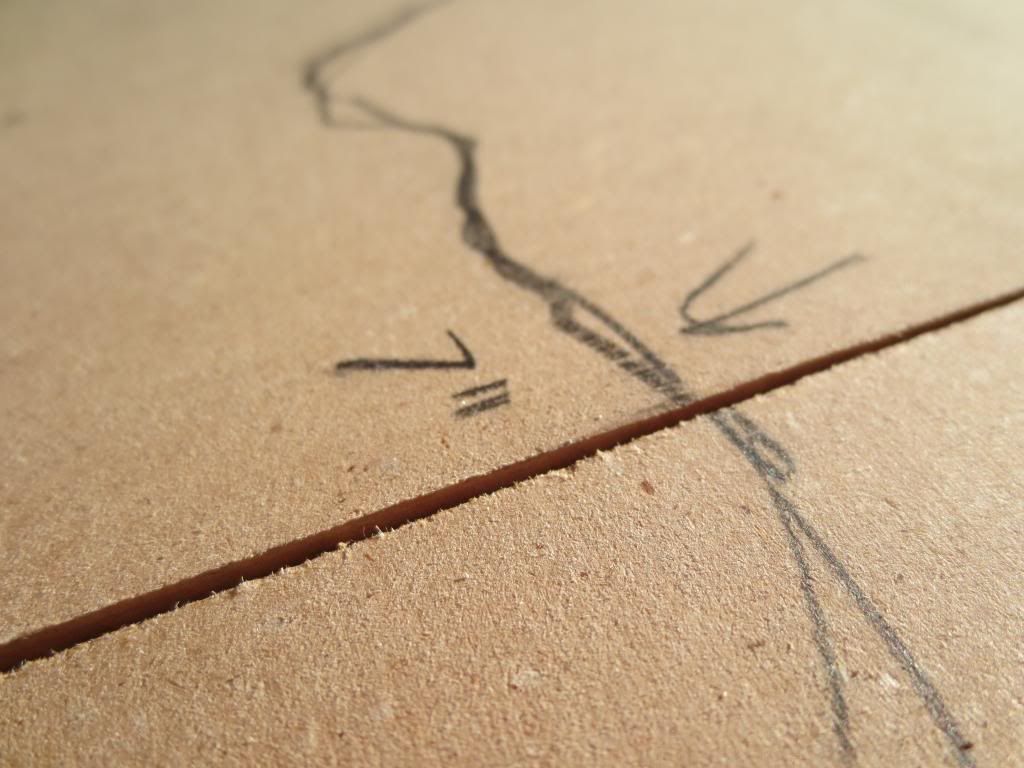
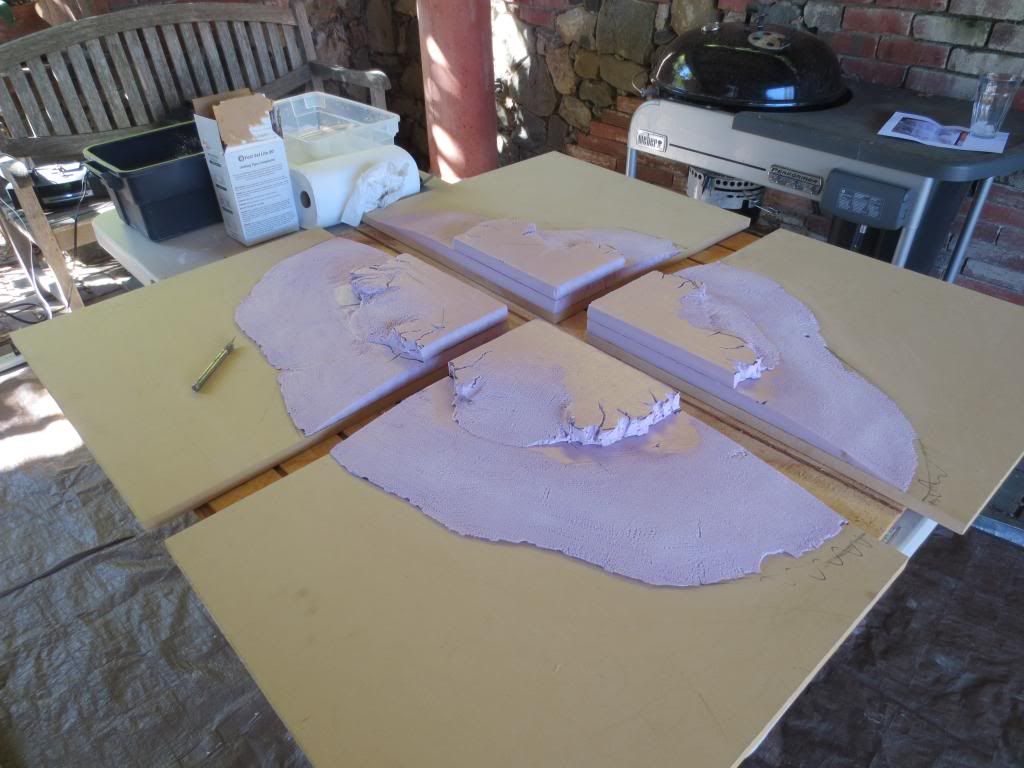
1). Measuring
After getting your boards cut in half in whatever way you do (see materials list), Measure out your hill in a way you see fit. Here's how I did mine:


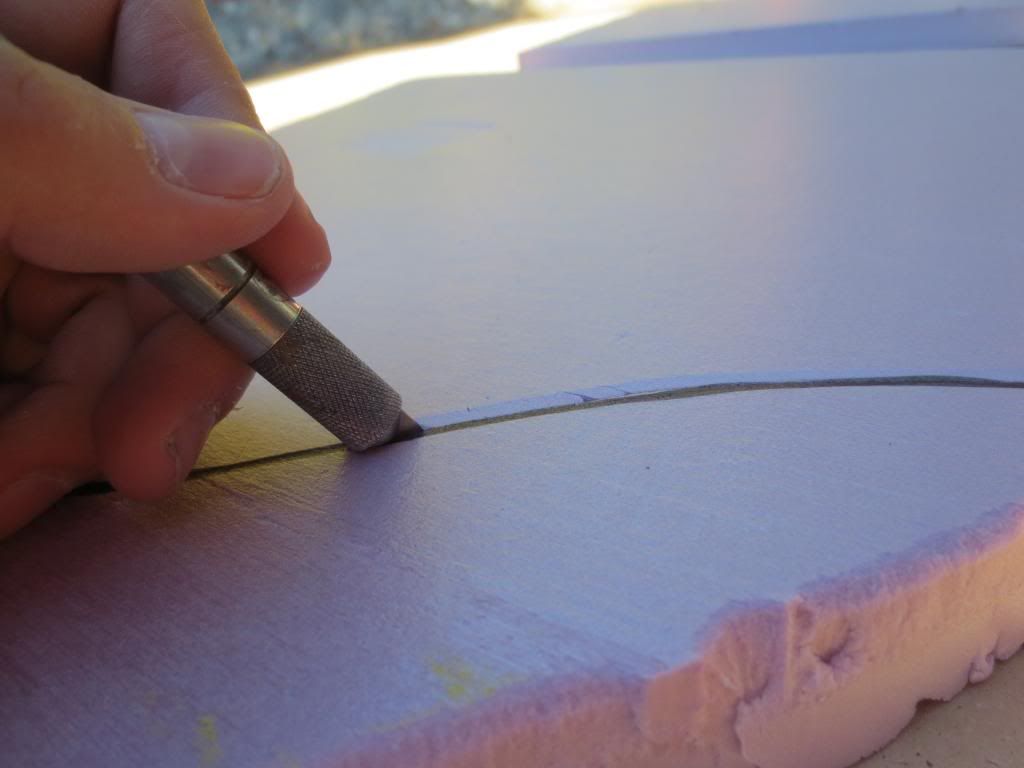
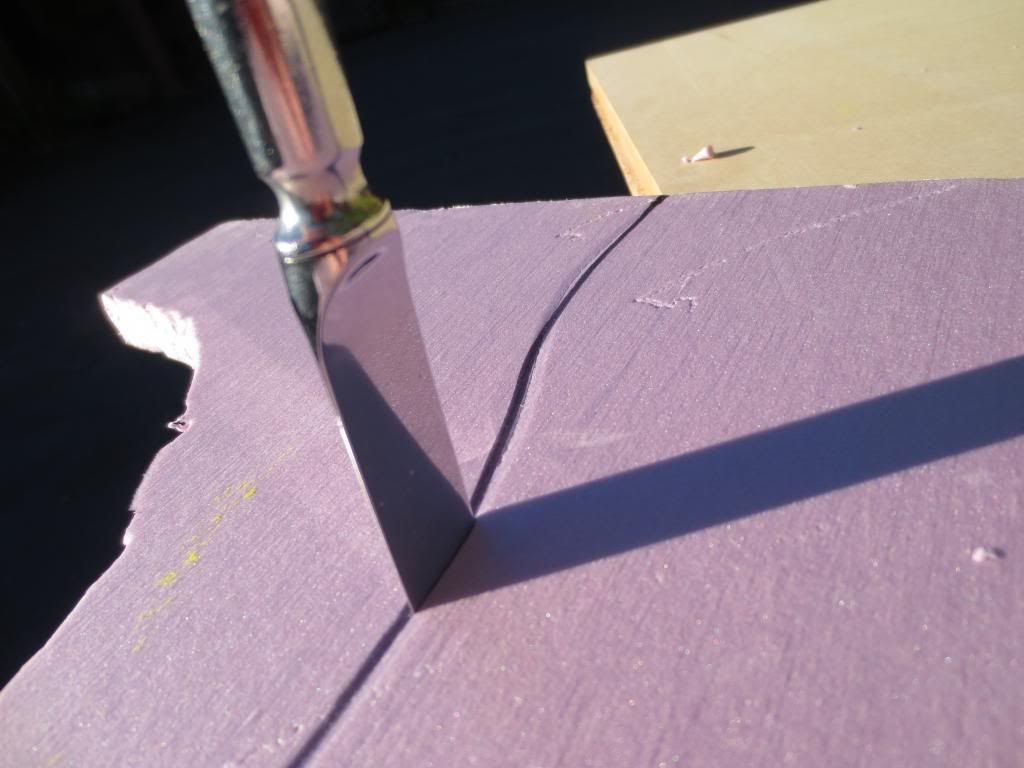
2). Cutting
Measure the same lengths on you polystyrene boards. Make sure you cut so you have a perfect corner and one wavy side. That’s why I used the small 2’ by 2’ sheets
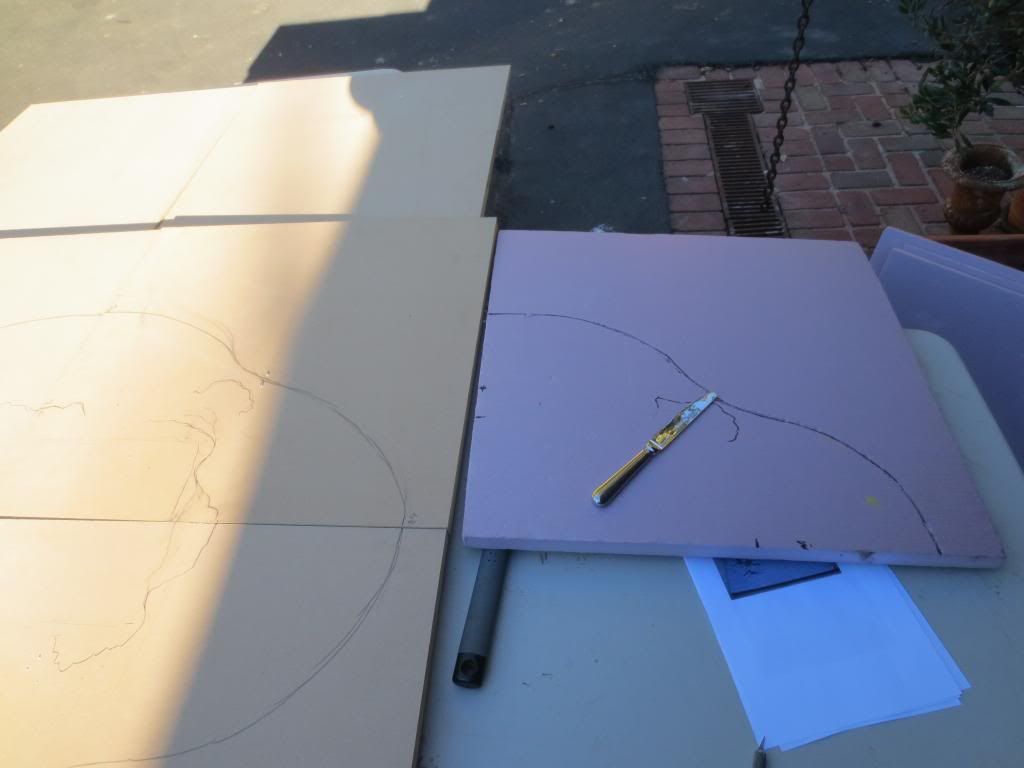
Cutting polystyrene can be a pain – I start by cutting with a hobby knife as deep as I can, then I poke holes through the cut with a butter knife. It should break easily and cleanly after that.
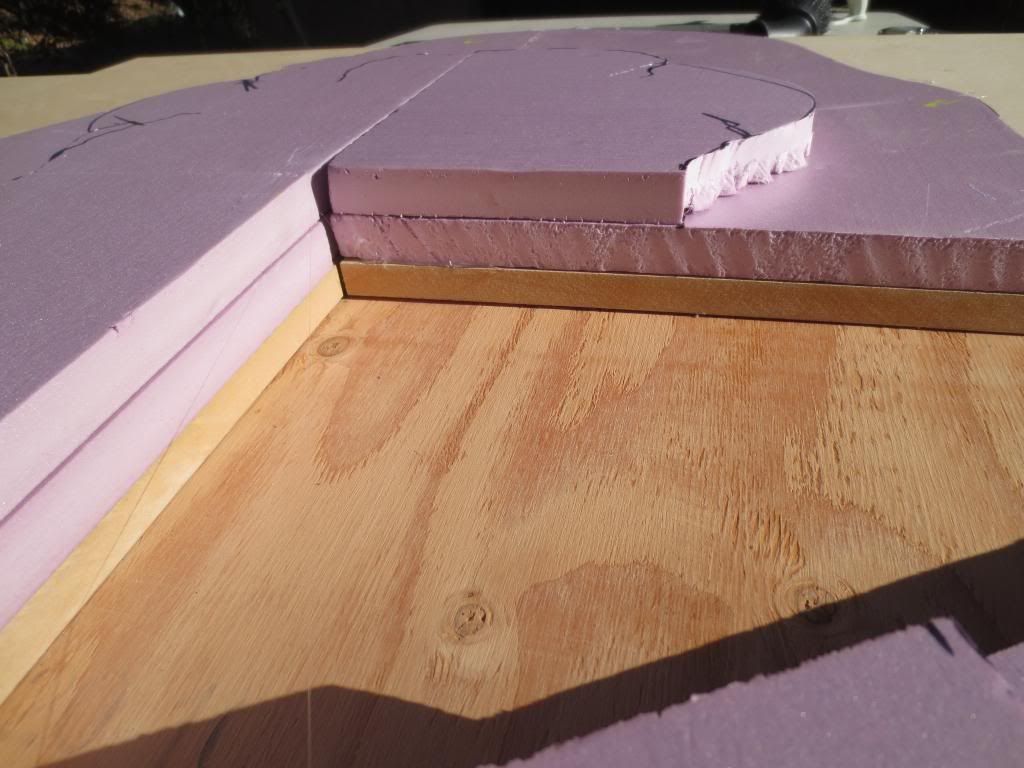
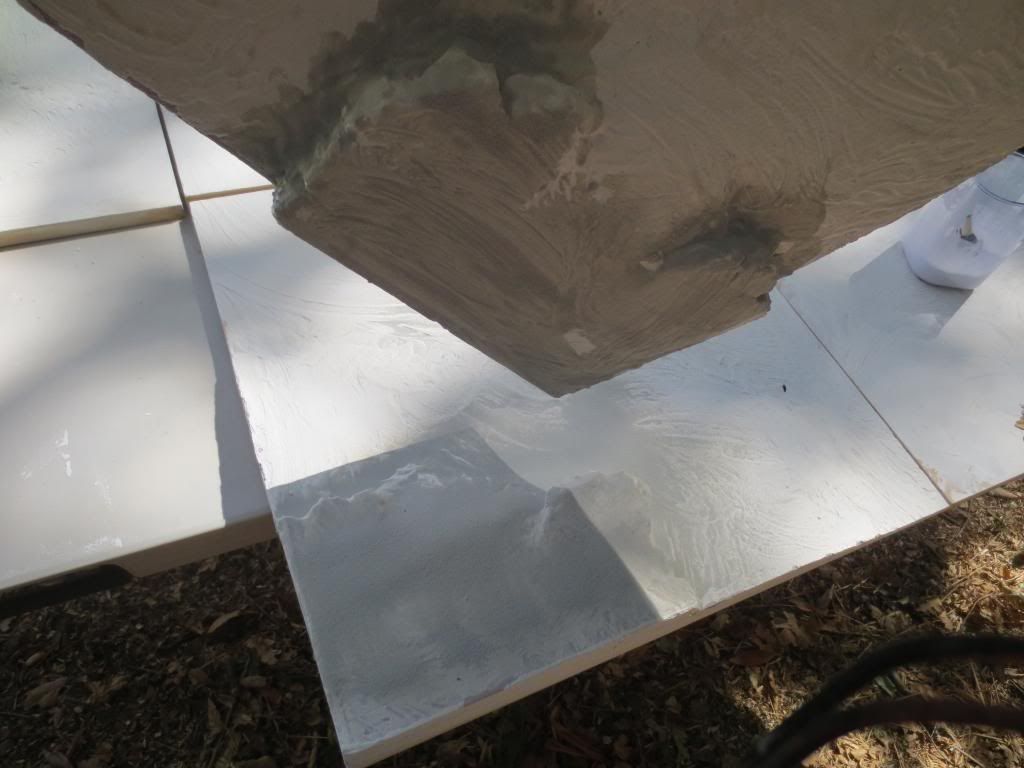
3). Anchor the foam!
With all your hills cut, glue them into place with a generous amount of hot glue.

Make sure your edges line up!
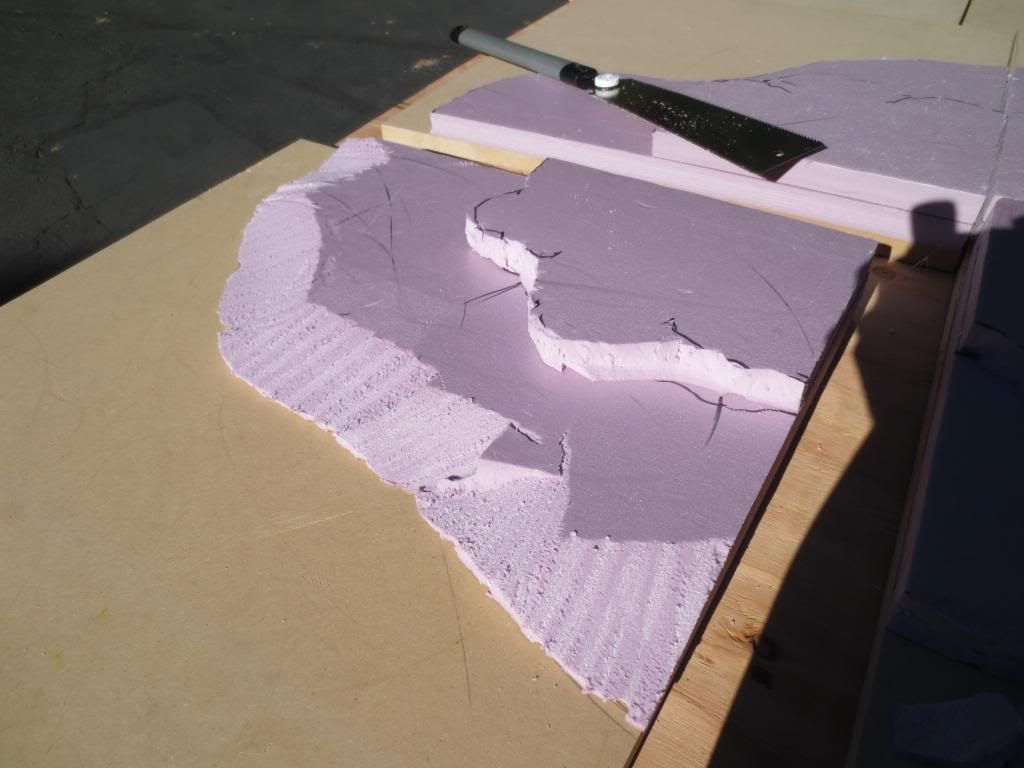
4). Carving
Using whatever saw you have, try to carve the start of a hill into each board. This step is awkward and difficult so be careful not to cut yourself. you can also use a serrated knife, but that’s also very dangerous. Knifes and saws are dangerous in general lol
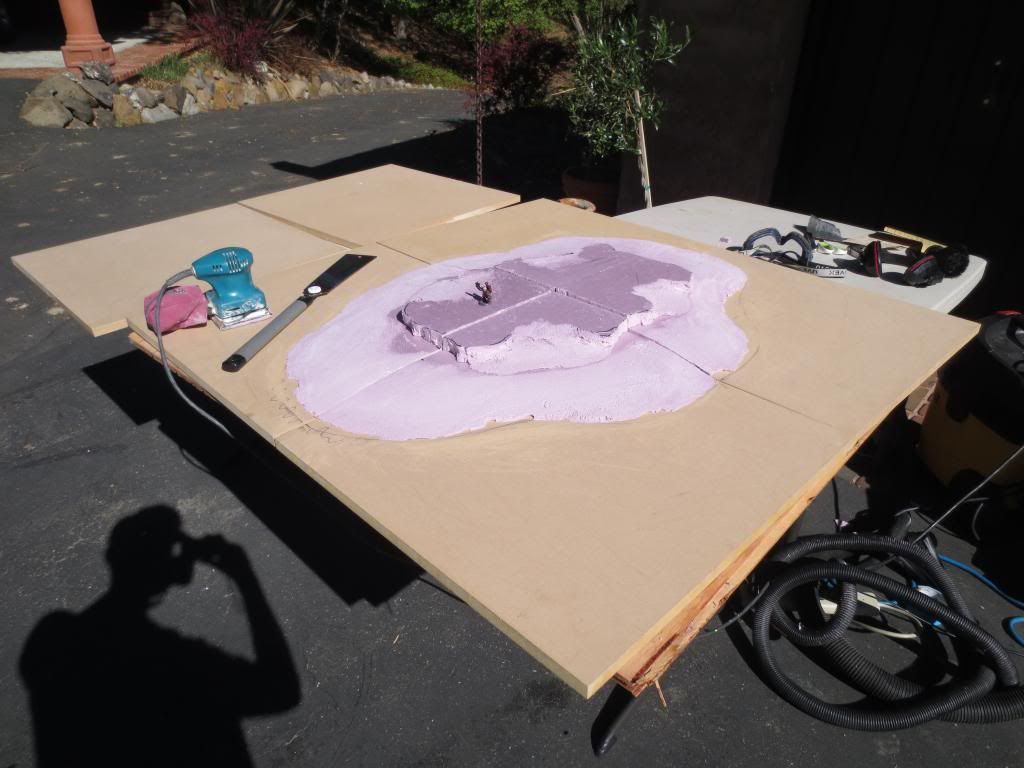
5). Time to sand!
Use a power sander with the coarsest sandpaper you can find
CAUTION: Sanding polystyrene released tiny particles into the air that can hurt your lungs. Use a mask and definently do this step outside
This is the messiest and least fun step of the process. I’d HIGHLY Recommend holding a vacuum in your non sanding hand to suck up the pink dust while you sand.
Sand with the hills all in a circle like this to ensure all of your edges line up
Use a model to test if your slopes are too steep. Also. make sure to sand a section of the second level into the slope so it doesnt look like its just sitting on top of the hill
If you don’t have a power sander, you caaan do this by hand but it will be a horribly tedious experience. Fair warning. At least mount your paper on a small block so you have a good grip.
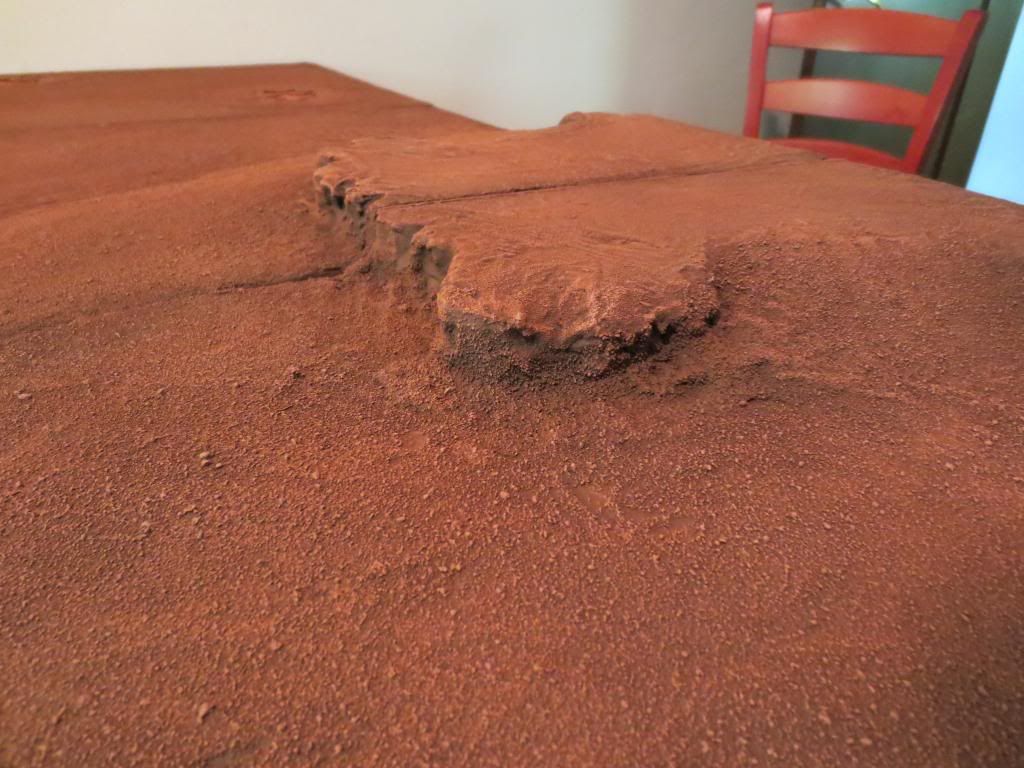
Once you've sanded the slopes, carve out some rocky texture into the plateau layer.
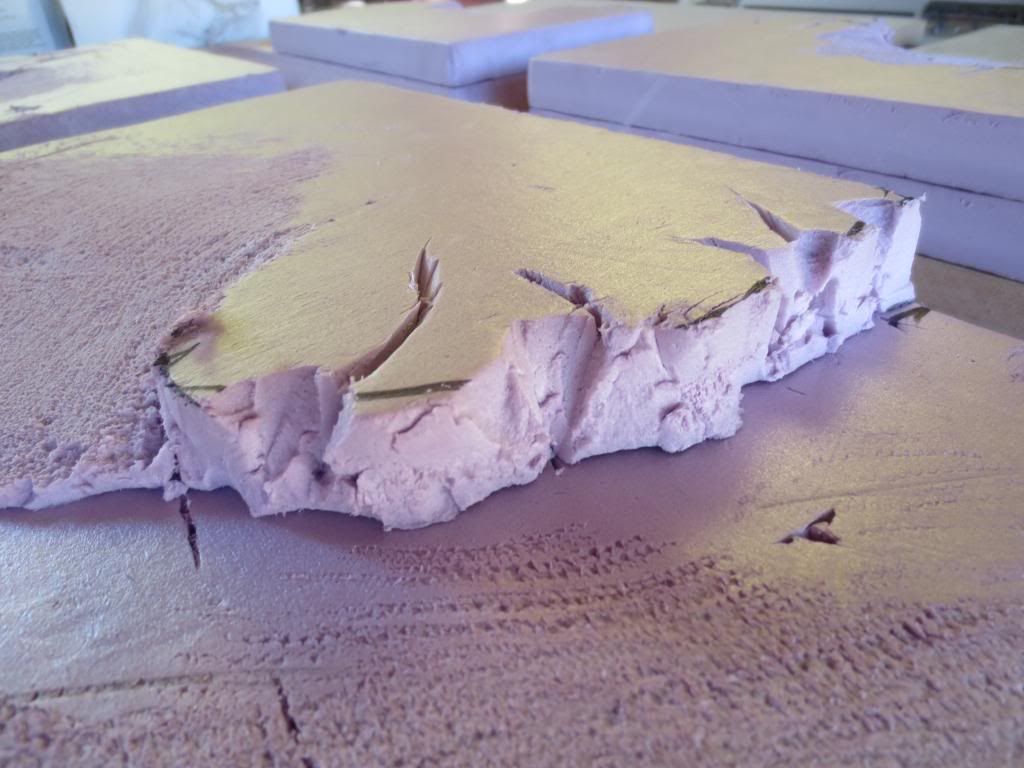
I REALLY should have done more, including carving some rock slabs out of the flat top of the hill, but i was lazy. I'd reccomend doing more than i did
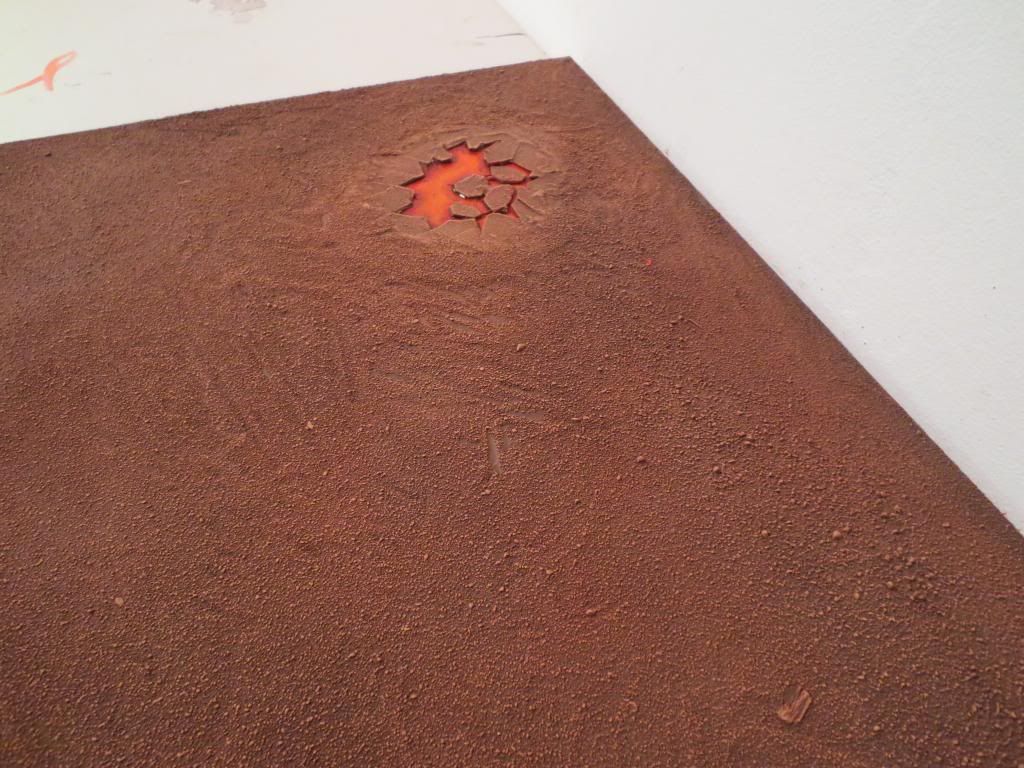
6). Lava Pits/ other details
I love the look of the RoB pits filled with skulls, and although I didn’t have any skulls, I did something sort of similar out of cardstock:
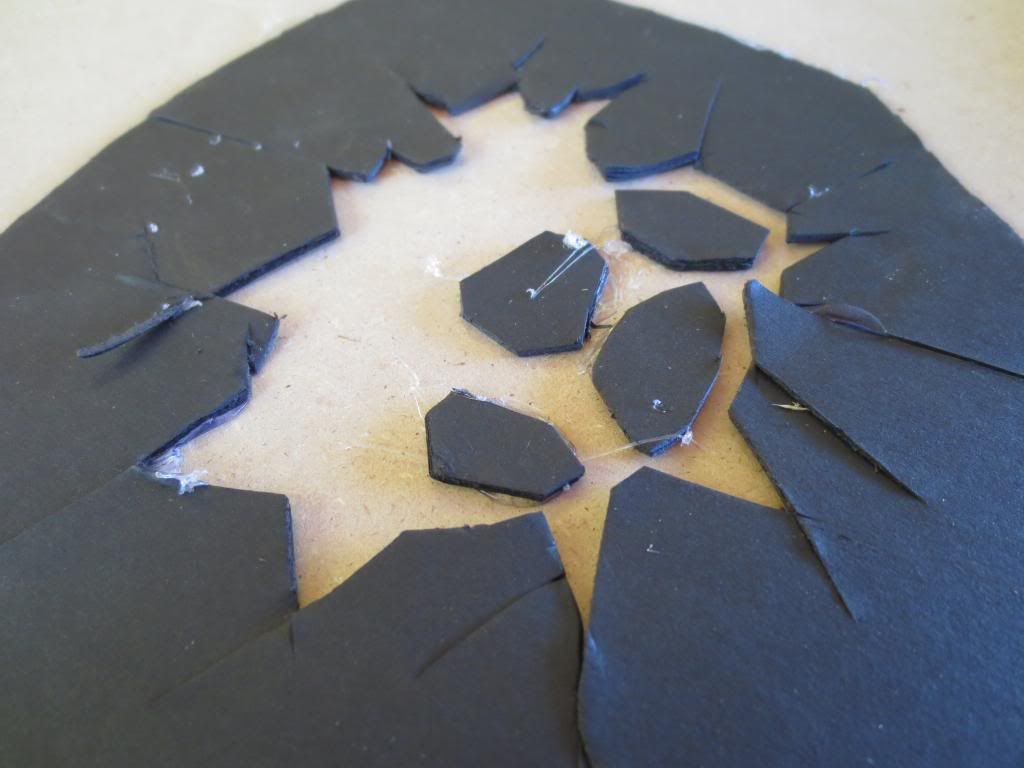
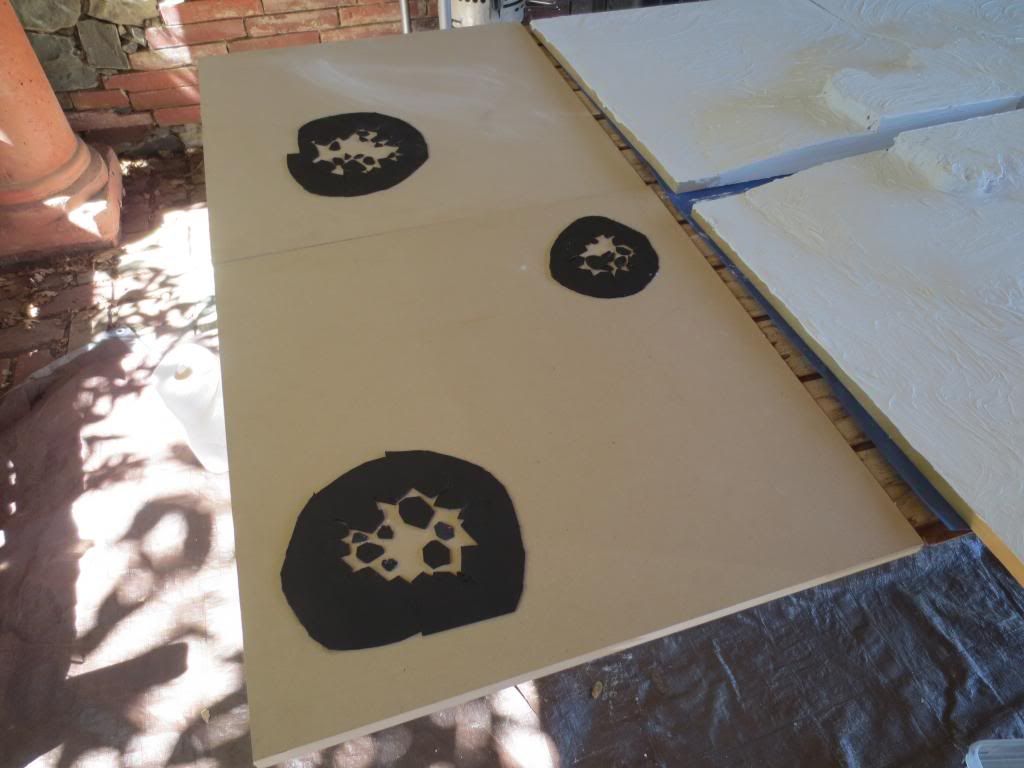
Be sure to sand down the edges of the cardstock
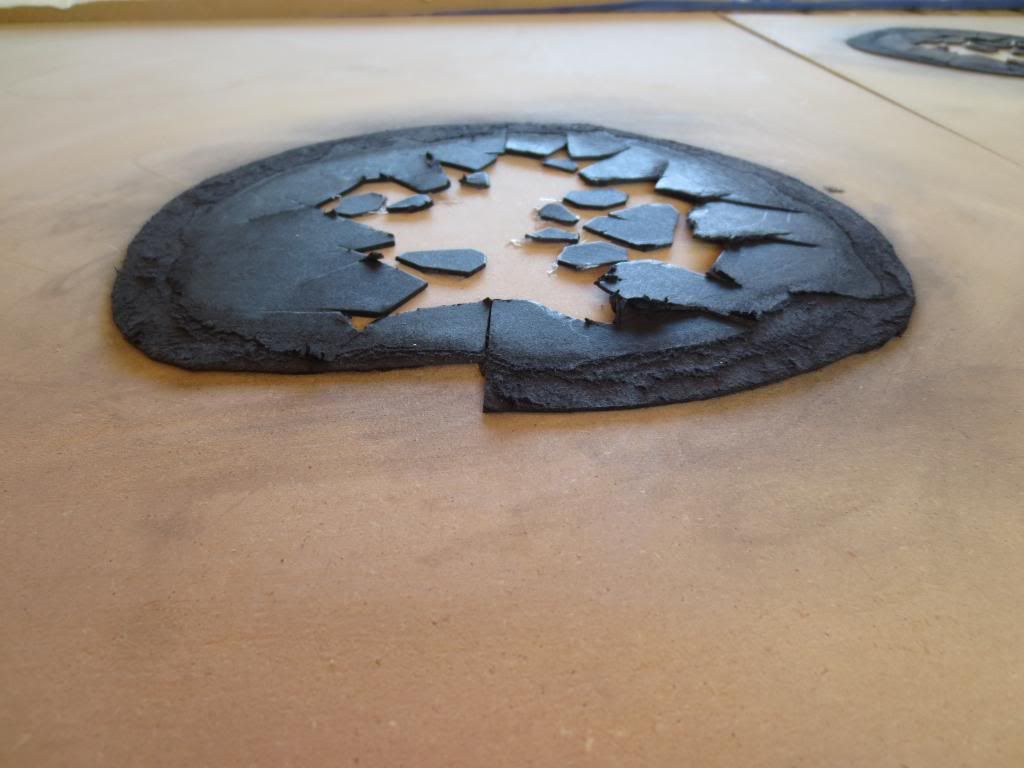
Note that this method can also be used to make the Realm of Battle tiles, rocks, roads, etc.
Of course there are endless variations you can do – it’s your board after all. (Building a fortress into the side of a hill, anyone..?) But I kept it simple this time
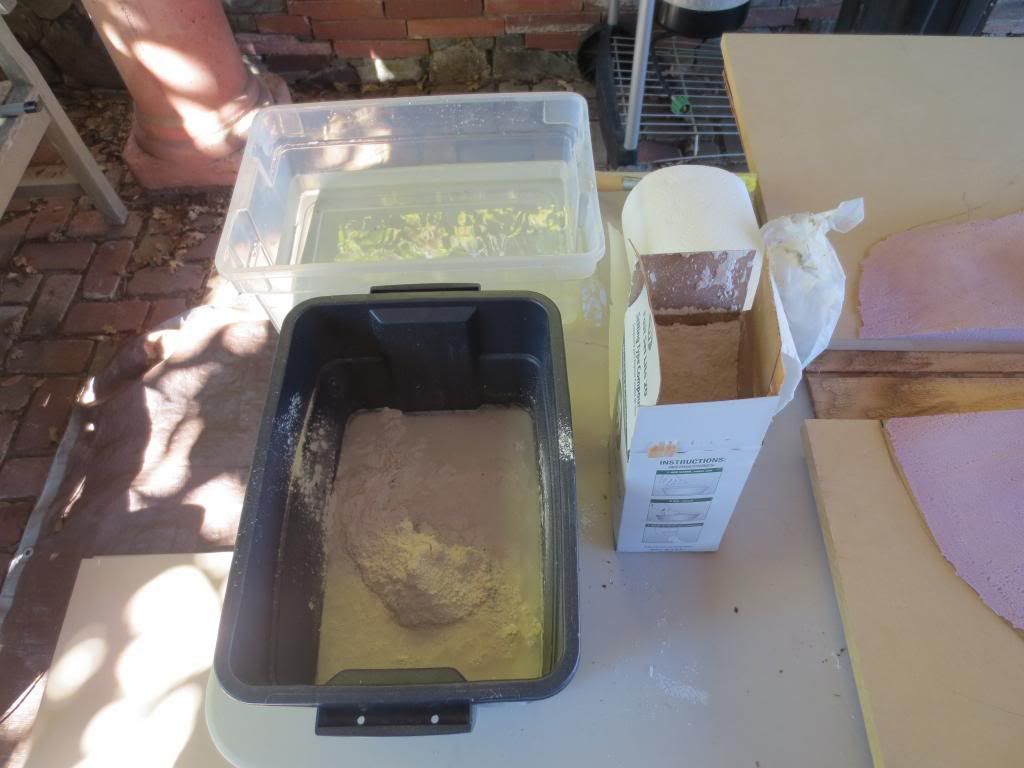
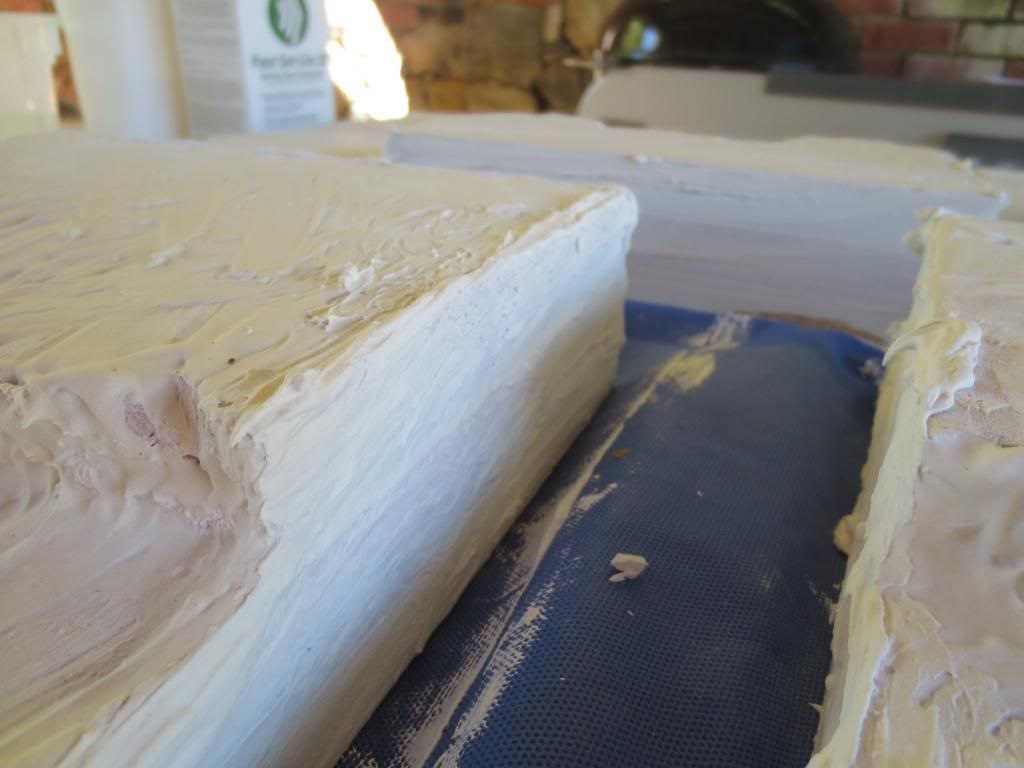
7). Plaster - Part 1
If you bought the same size box as me, I’d recommend mixing 2/3 of it up at this step
Don’t worry about the ridges, this gives the board a lot of texture, and you’ll sand most of them down anyway.

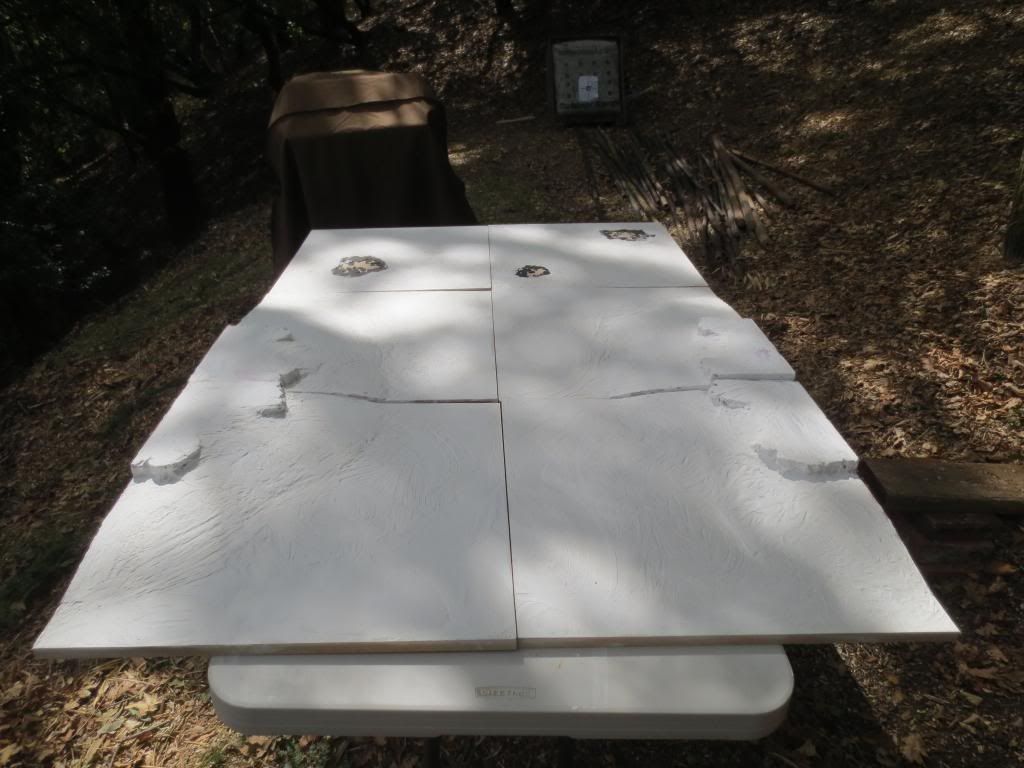
8). Plaster – Part 2
Let dry, then sand down the plaster with coarse paper so its slightly flatter. Leave plenty of texture, however. Be sure to (very smoothly)sand down the sides!
^^Too Rough!^^
9). Plaster – Part 3
Mix up more plaster and fix up any seams between the hills and the MDF. Also, try to fix up the transition between the Lava Pits and the MDF. This is where I wish I’d had the Joint Compound, as its slightly easier to work with then the plaster in small areas.
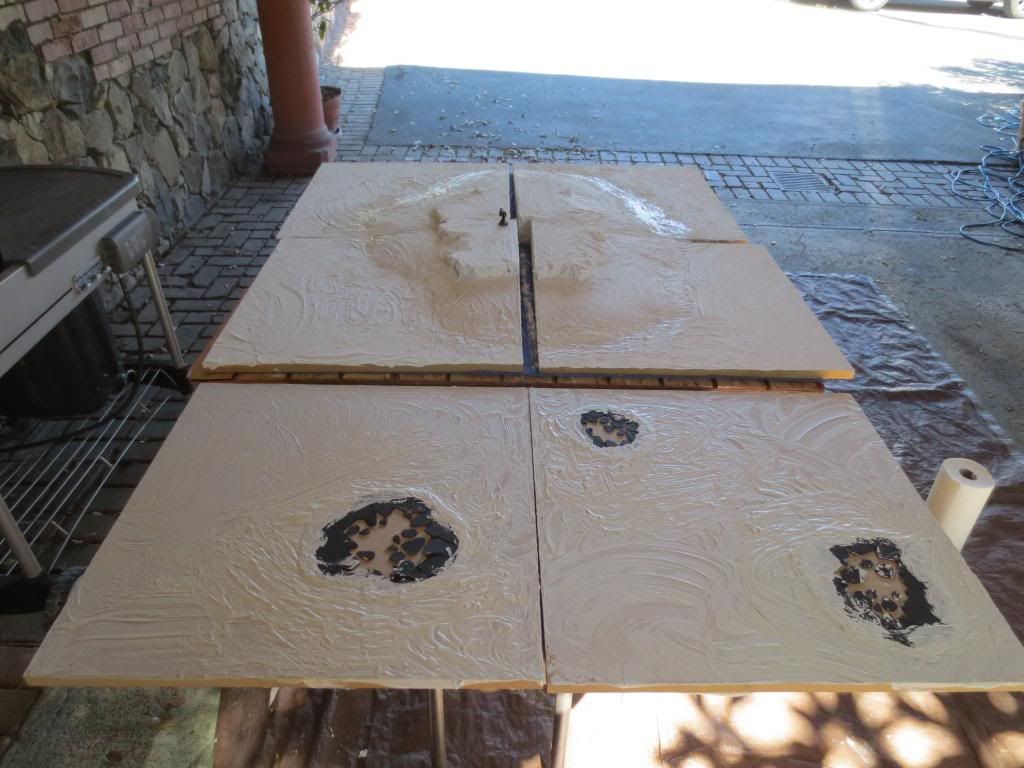
As you can see, I didn’t quite smooth out the seam between the Lava Pits and the MDF enough. Oh well.
Sand down the second layer and double check that all the sides are smooth
10). Lay on the sand
I used about a 50:50 mix of Glue and Water. The plaster does a good job of preventing warping, but I still wouldn’t add any more water than that. You may want to add a touch of black paint so you can see where you’ve applied the glue so you don’t miss any spots. I wish I had done this
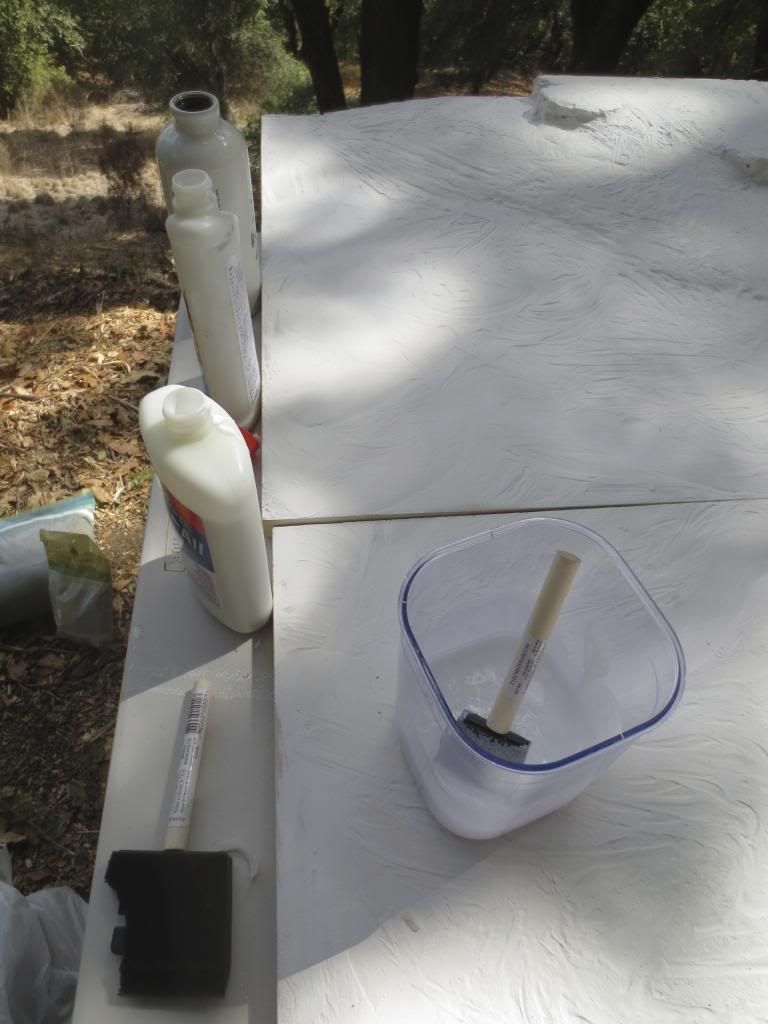
I use those black foam disposable brushes for this, not sure what they’re called
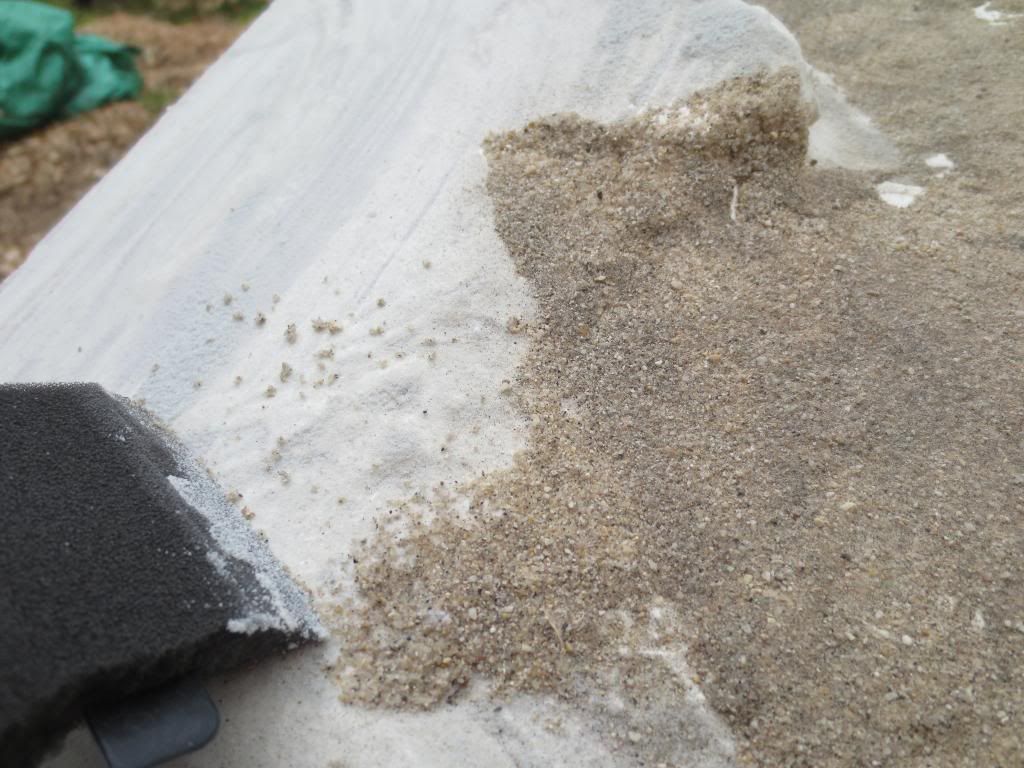
FIRST apply fine sand to the rocky outcrops. Shake each board off onto the next board so you can conserve sand.
Do the same thing with the coarser sand on the rest of the board until you’ve got the whole board covered
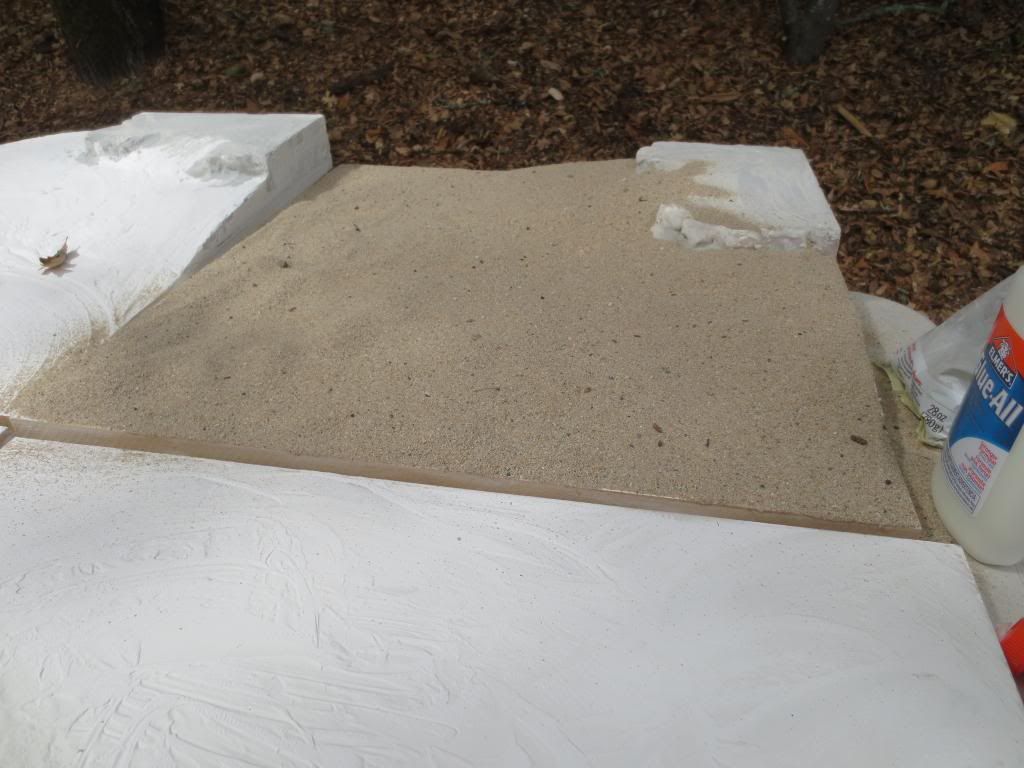
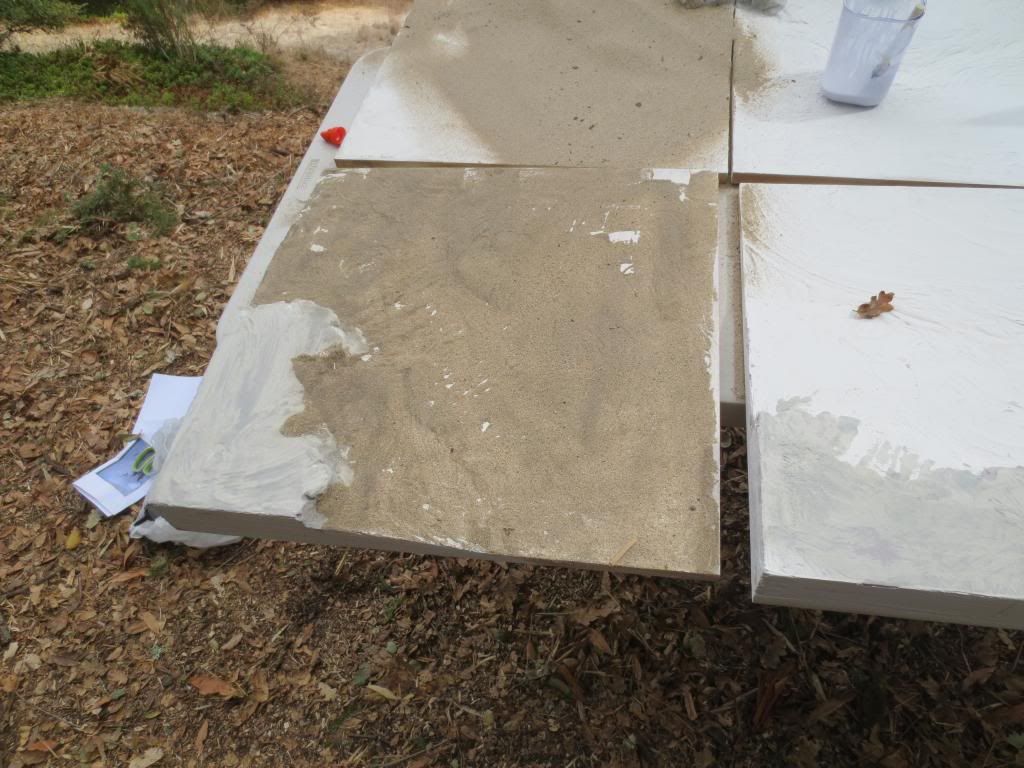
As you're going, blend any seams between fine sand and coarse sand with a foam brush
Once the glue has dried completely, use a dry, clean and stiff-bristled brush and lightly scrub the board to get rid of some of the half-glued grains. Don’t go crazy though
Sand any sand (huh!) off the edges if some glue spilled over
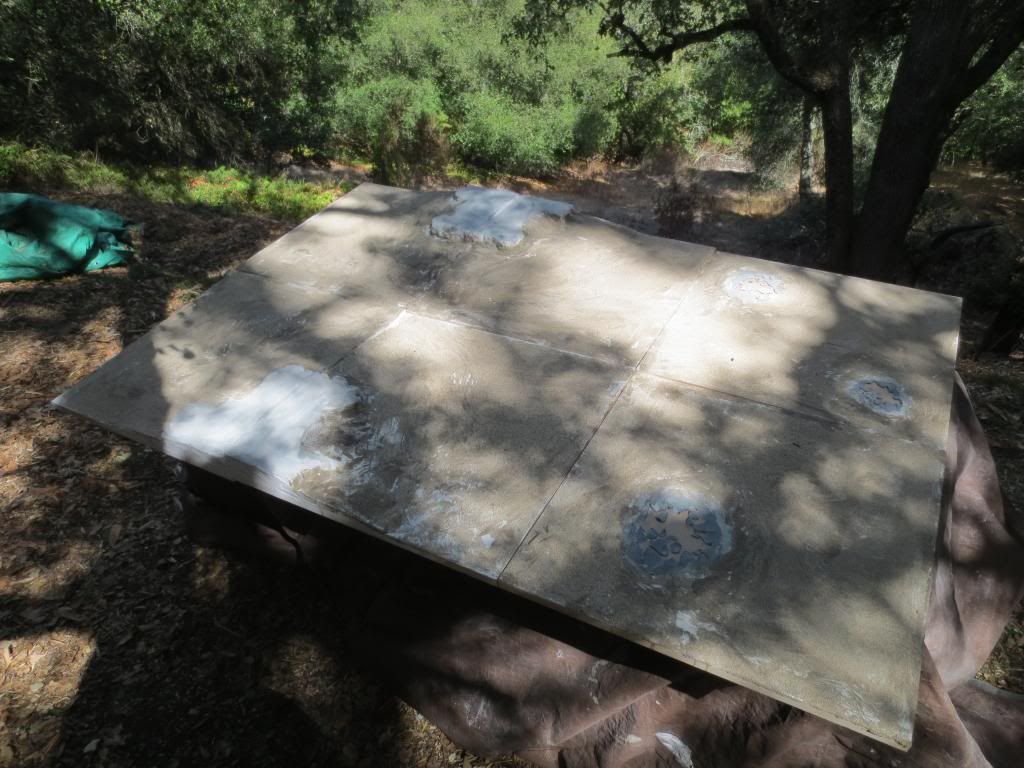
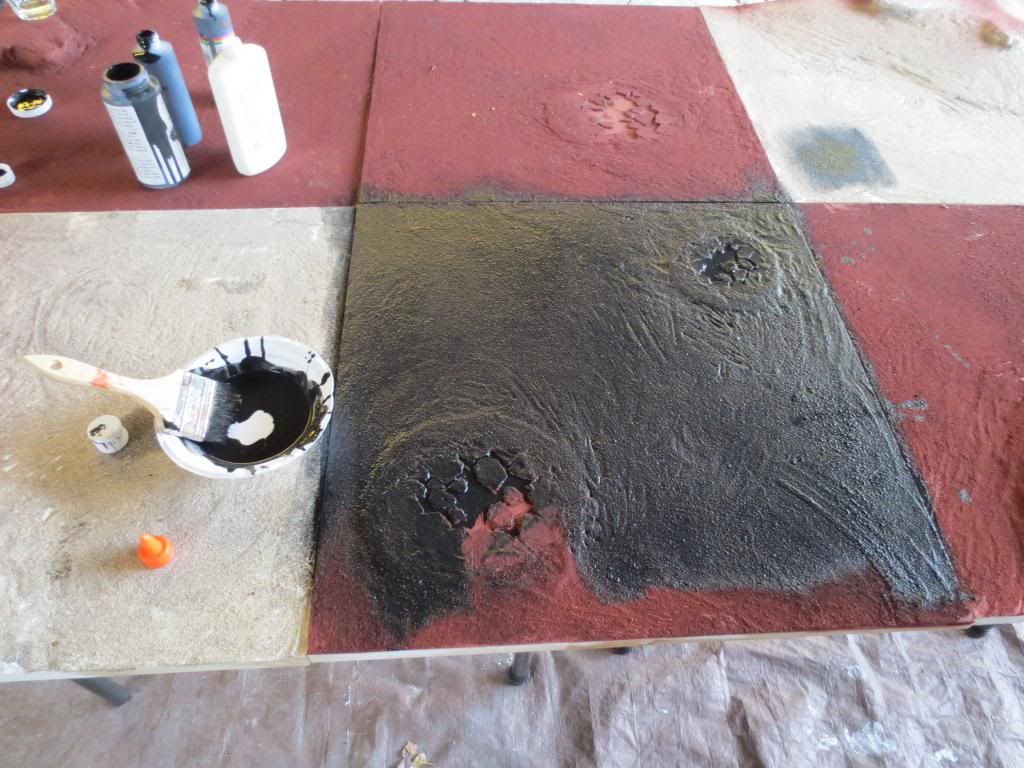
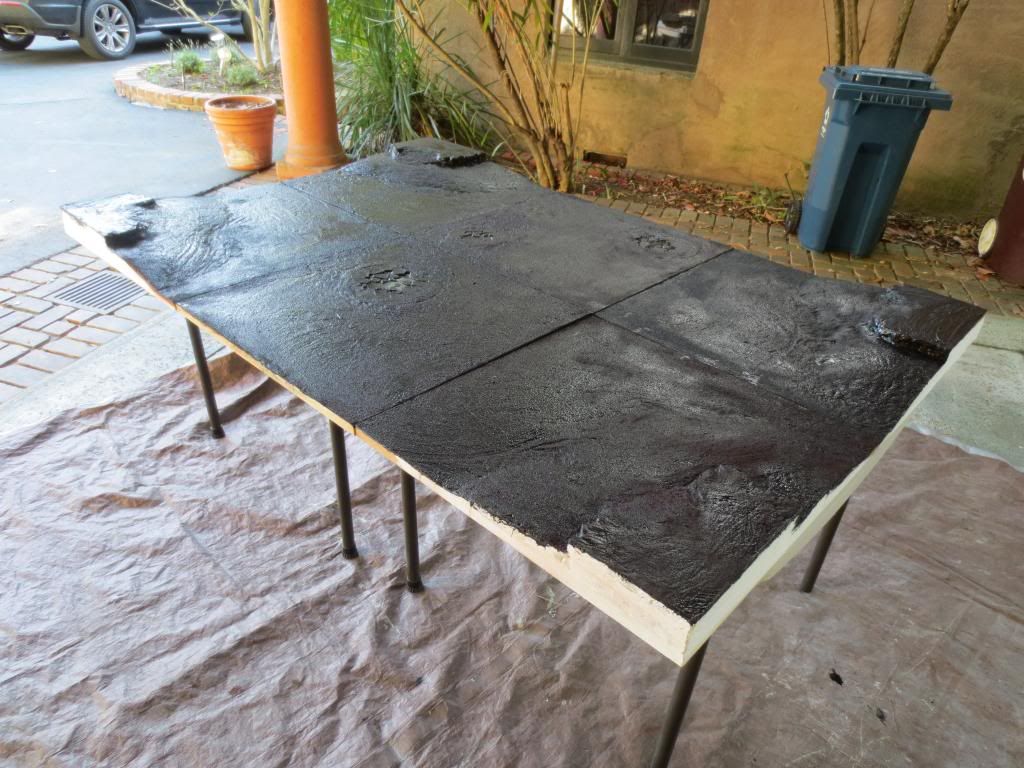
11). Seal the sand
*PLEASE IGNORE RED PAINT. Made a mistake and forgot this step. DON’T skip this step, it keep your boards from shedding sand everywhere whenever you transport them
Mix up about a 1:1:1 mix of glue, water, and your base color. I used black, but id highly recommends using something lighter and closer to your final look, otherwise your board will look really dark. I needed a couple coats of my base color to cover the black.
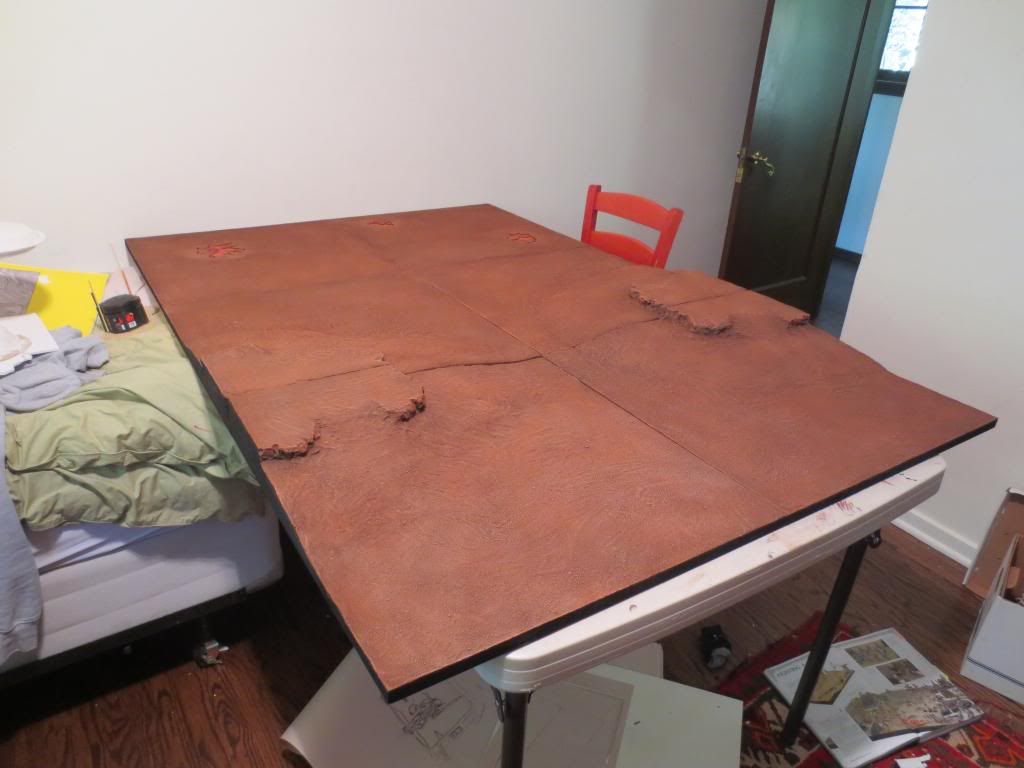
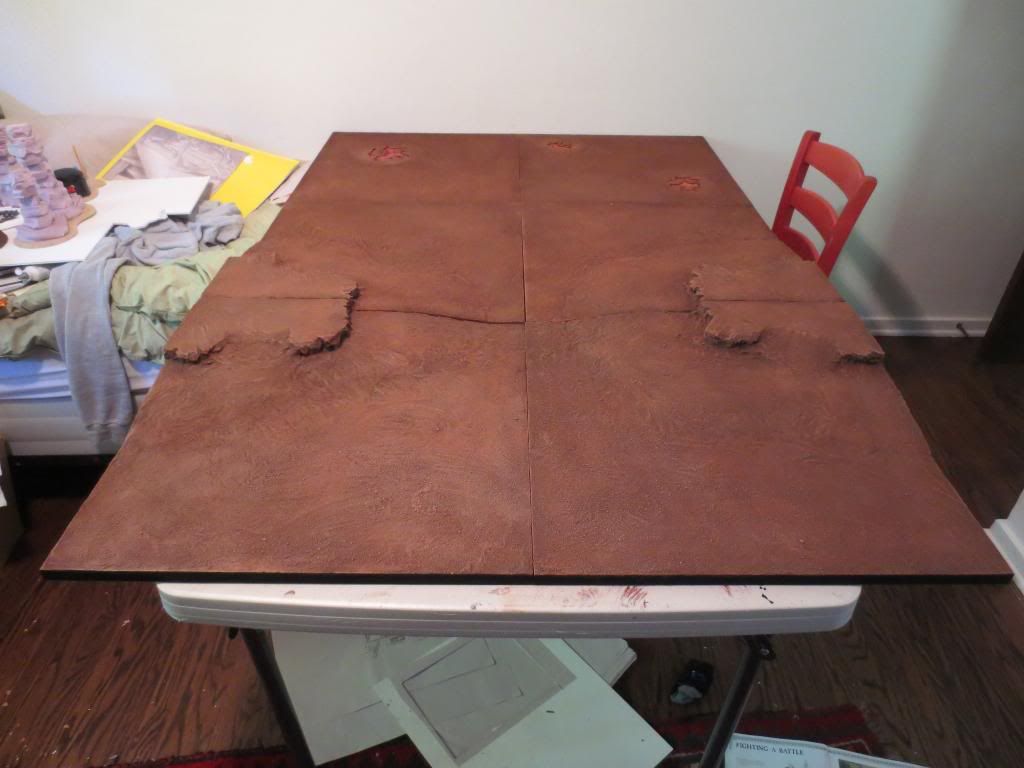
12). Paint!

^^Mid-Painting^^
I’d apply another slightly watered down coat of your base color over the glue/paint /water mix to make the color even
If you want to use my scheme, here’s what I did:
Dirt
Basecoat FolkArt Coffee bean – aka Dark Brown
Overbrush (Heavy Drybrush) Americana Burnt Sienna
Drybrush 50:50 Americana Burnt Sienna and Terra Cotta
Very Very Light Drybrush 1:1:1 Burnt Sienna, Terra Cotta, White
In my opinion, terrain tends to look like absolute (please do not swear) until that magical last pale drybrush, so don’t get discouraged if it doesn’t look right during the first two steps
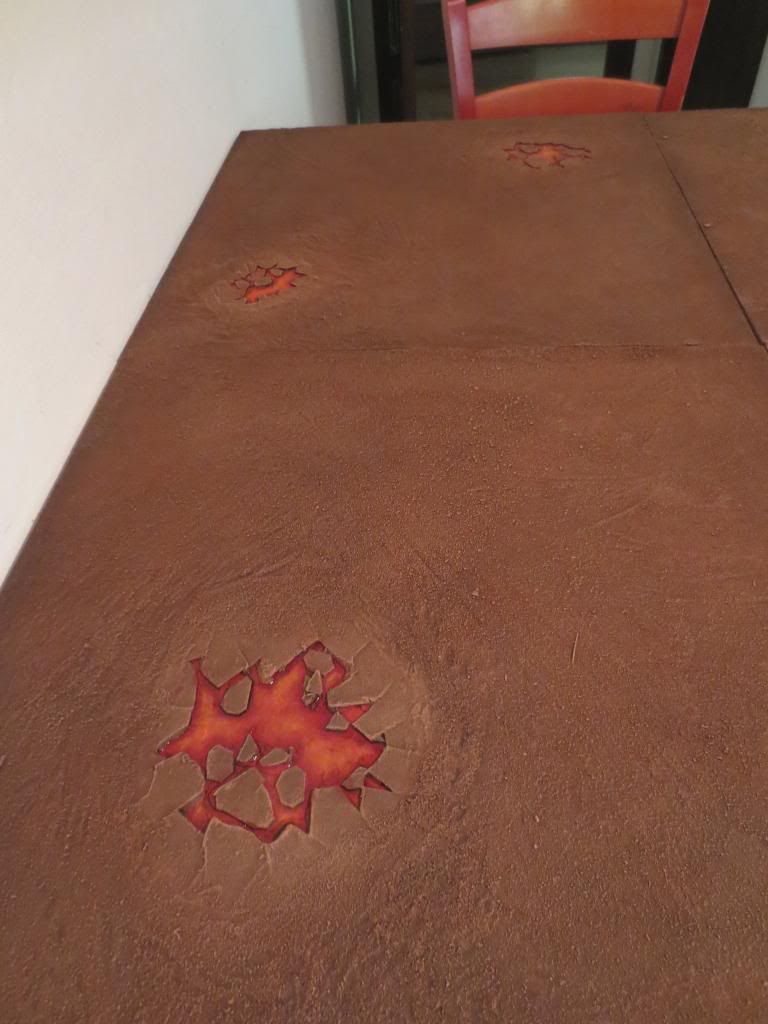
Lava Pits (GW paints)
*The pit should always be darker towards the edges and brighter towards the middle
Basecoat Khorne Red
Overbrush Blood Red
Drybrush Blazing orange
Light Drybrush Golden Yellow
Very light drybrush Sunbusrt yellow
Tiny, tiny light dry brush skull white in some areas
Wash edges with Alizarin Crimson Wash, use a sponge or paper towel to blend wash towards middle of pit –don’t cover the whole thing though!
13). MOST IMPORTANT STEP
Paint the sides black!!! Painting the sides black makes it instantly look 100% more professional. It’s amazing.
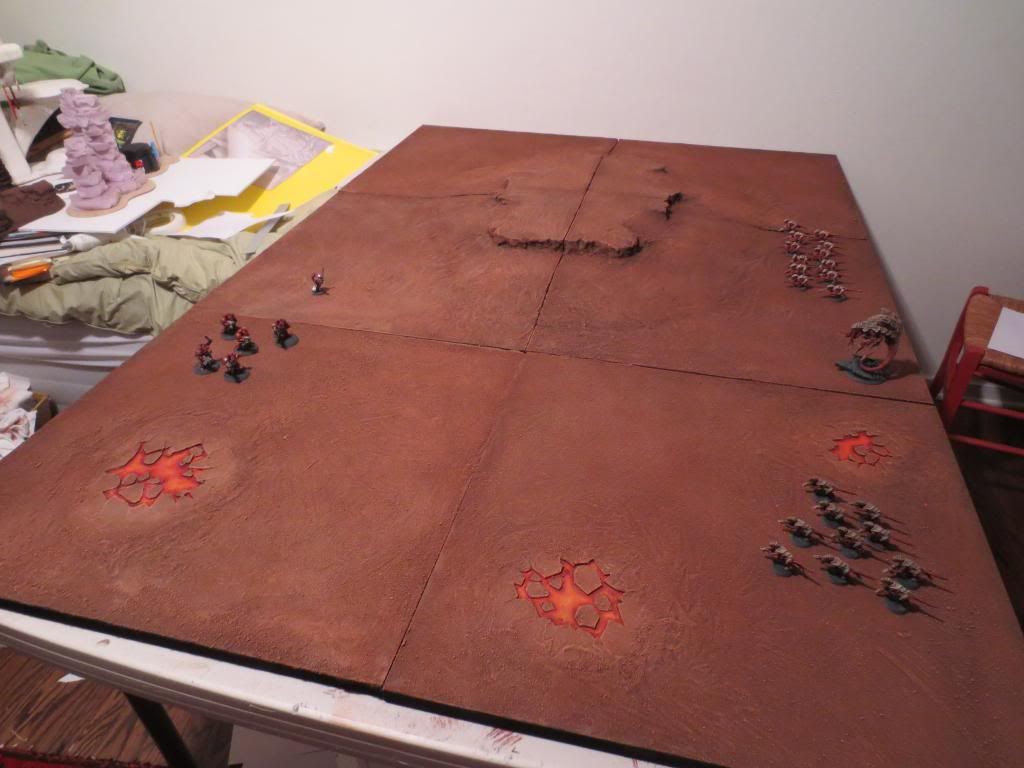
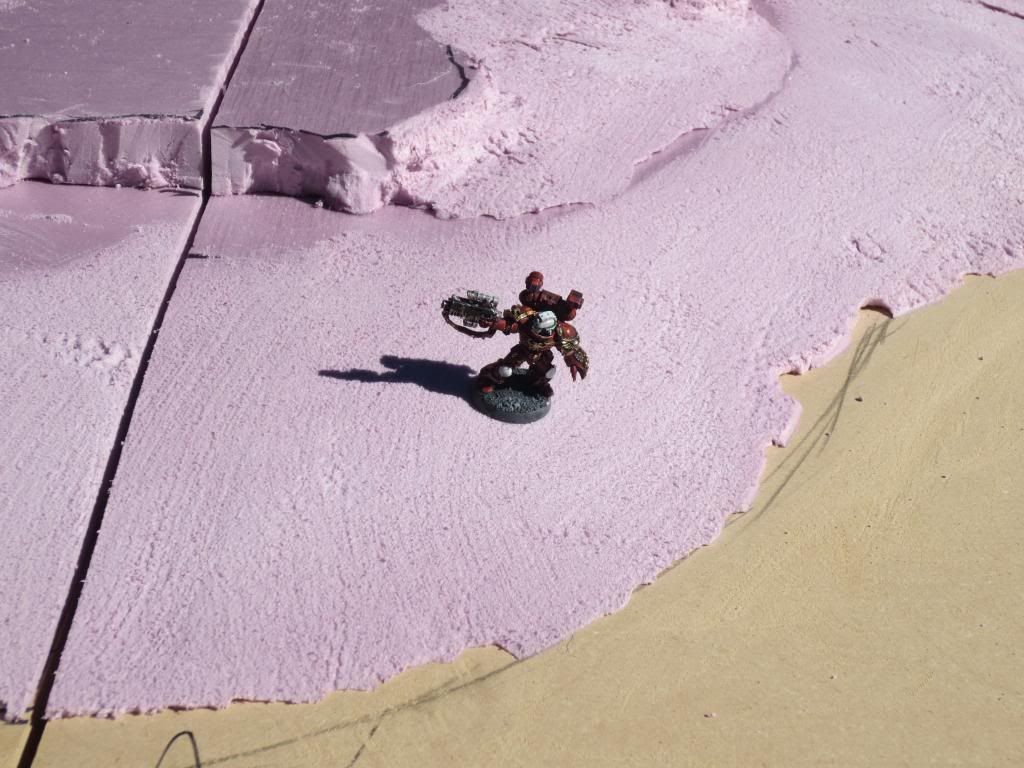
The Final Product
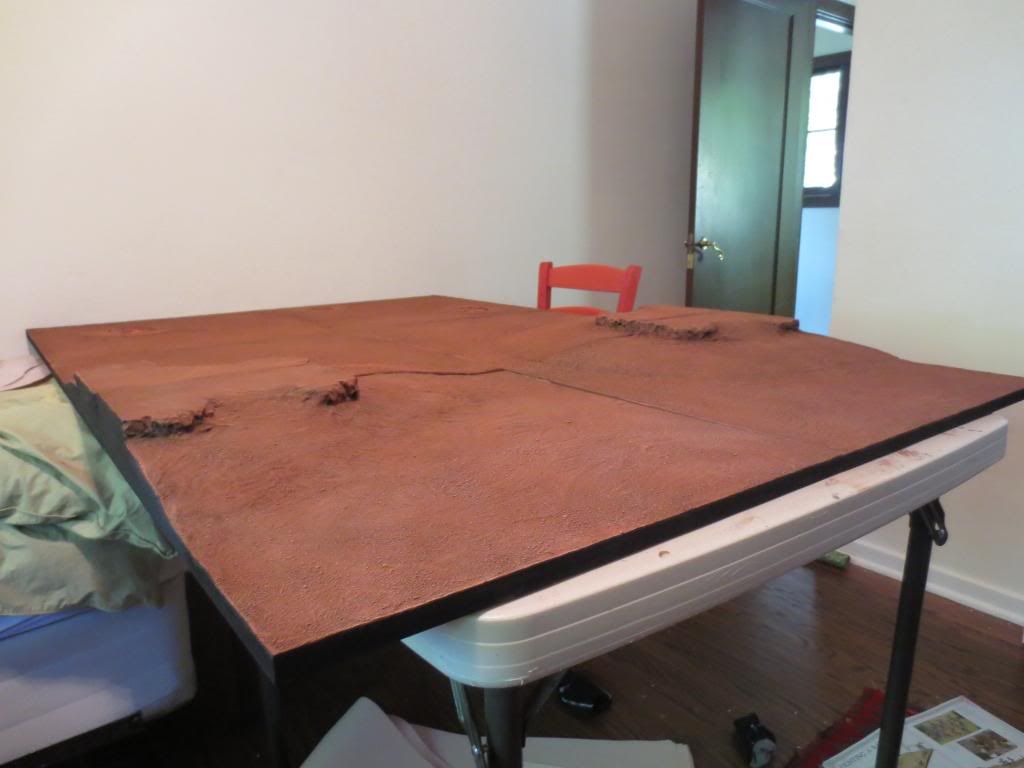

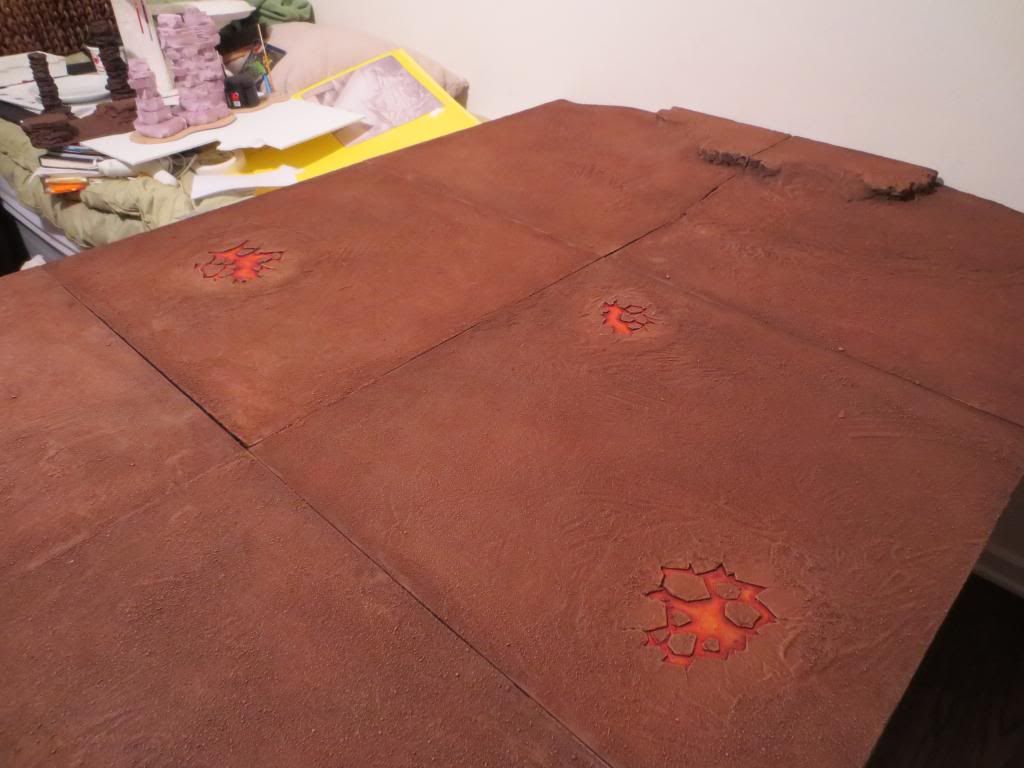
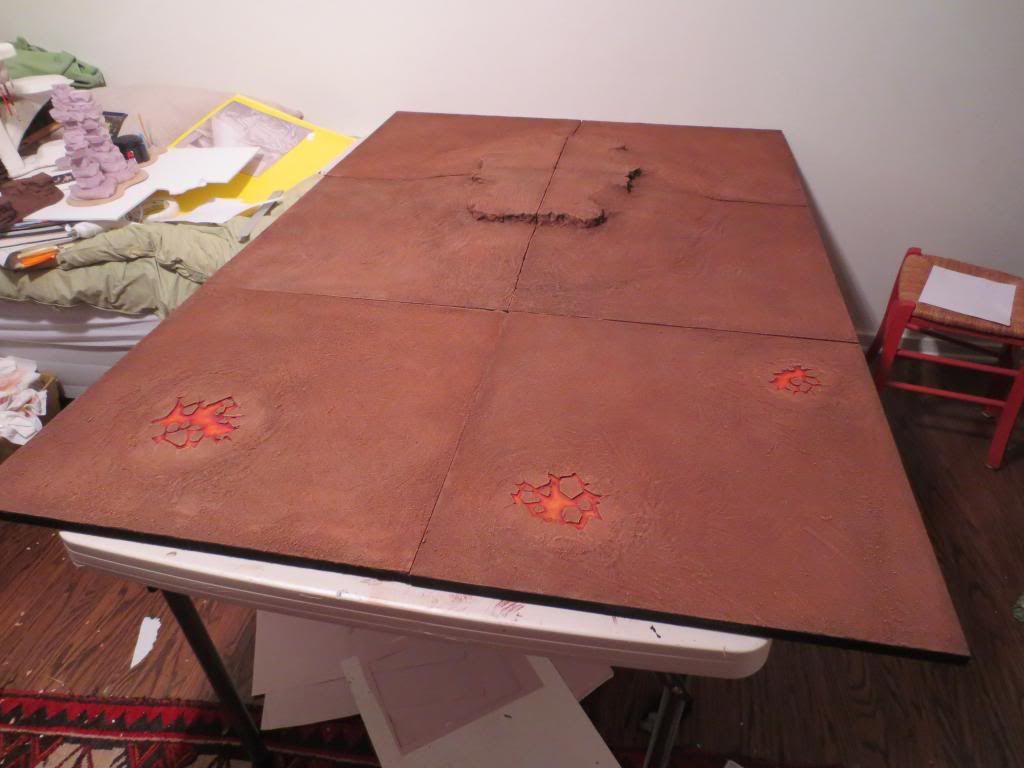
So that’s my finished Project!! Obviously my method is a lot of work but the final product is super sturdy and neat looking
Shopping List
Home Depot/Large Home Improvement Store(3) 1/4 inch MDF boards (2'x4') 24$ total
-If you don't have the tools to easily cut these in half, many large home improvement stores like Home Depot will do it for you before you leave store
-DONT get MDF thinner than this, because although it’s lighter, it ALWAYS warps. It’s horrible.
Big bag of Sand 5.00$
-Find this in aisle near concrete
Fast Set Lite 20 (powdered plaster) 5.00$
-Find this in section with drywall materials
*Opt: All purpose Joint compound or maybe spackling paste 5.00$
-Find near fast set lite 20 or near spackling pastes
-I didn’t use this for this particular project but wish I had. Good for touching up small areas after you've used the plaster. You'll see what I mean
Polystyrene about 25$
(4) 1" thick 2'x2" sheets if they have them
(1) 1" 8'x4' sheet if not
* This is the pink foam you always see terrain tutorials using. It can be hard to track down but MOST warehouse stores like Home Depot carry it. When buying large sheets, transport can be an issue, so if you can convince them to cut it along with the MDF boards this really helps. Sometimes they won't and you may get funny looks
Local Hardware store
White "Elmer’s" Glue 32. Oz. 12.00$
-When I asked if they had this at Home Depot they told me it didn't exist. Ok dude...
Sandpaper – coarse ?$
Michael's/Craft or hobby store
Matte Board aka 2mm card aka the thicker version of cereal box cardboard 5.00$
-You may have some of this lying around but it’s cheap to buy
Small bag Fine Decorative Sand 5.00$
*OPTIONAL: Paints
-This is only if you want to copy my scheme. If not, just do yourself a favor and NEVER, NEVER use GW paints to paint a game board. That will cost you more than a realm of battle itself.
-Please excuse my random brand choices. It’s a long story.
-If you're shopping for paint at a craft store, paint quality from best to worst: Ceramacoat, Americana, Folkart, Craftsmart. Not sure about other brands. Most of these are only good for drybrushing, BTW
Craftsmart "Black" 16 oz. 4.00$
Folkart "Coffee Bean" 8 oz. x 2 8.00$
Americana "Burnt Sienna" 2 oz. x 3 3.00$
Americana "Terra Cotta" 2 oz. x3 3.00$
Craftsmart "White" 2 oz. 1.00$
Tools
Hot Glue GunPower Sander, sandpaper
Hobby Knife
Butter Knife
Saw
Paintbrushes
Scissors
Gas mask/cheap paper mask from hard wear store
Bucket for plaster
(this list might be incomplete…)
In Conclusion
What do you think? Was this tutorial helpful? There are a lot of methods to making a board (and I have tried a LOT of them) and this one has worked best for me. Hope I had some helpful tips to help other beginners avoid the mistakes that I made!
Thanks for reading
-nox
Wow, a really great tutorial. I was doing a search for red Realm of Battle boards and found your tutorial. I honestly didn't realise it was a scratchbuilt board, I thought it was the real Realm of Battle. Like I say, really great.
ReplyDeleteI love this tutorial. It's helped me with my own gaming board - thanks :)
ReplyDelete